
Paper crafts
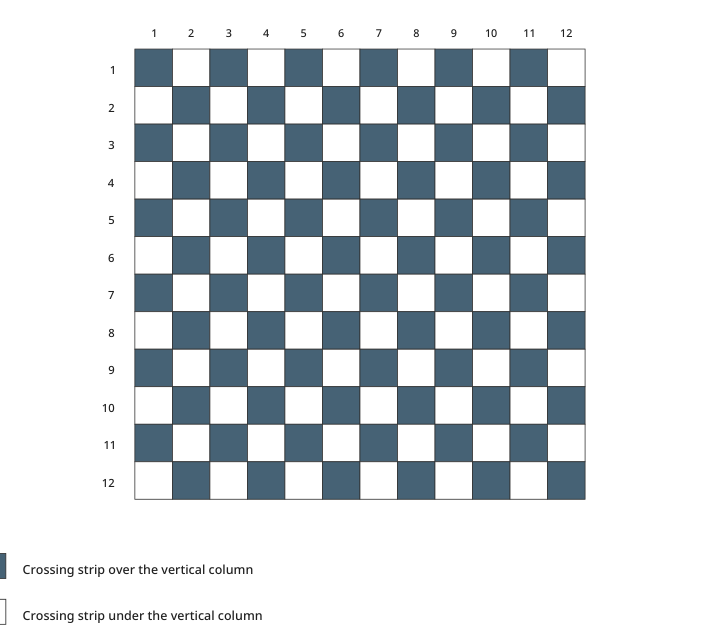
Plain paper weaving mat
Try a plain paper weave with alternating crossings and a matched chart. This is a useful starting sequence before comparing diagonal or balanced-twill variants.
Paper crafts
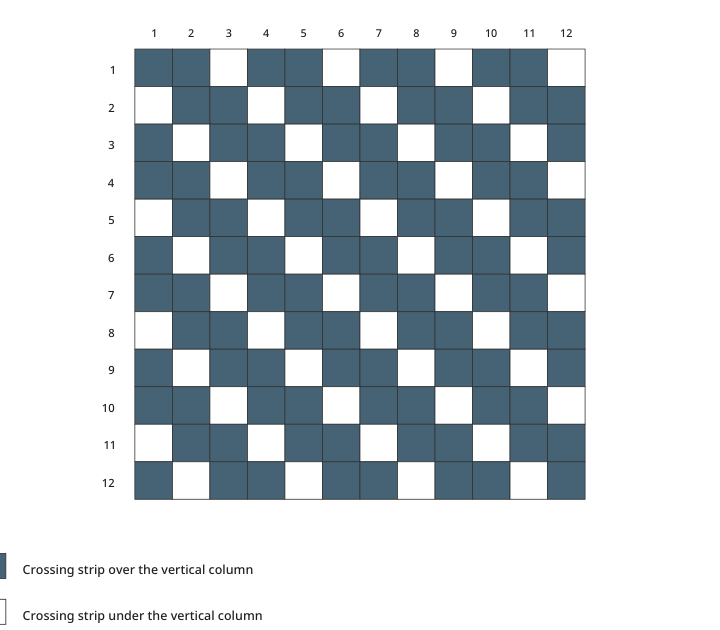
Explore a balanced twill paper weave with two-over, two-under crossings and a four-row sequence. The packet includes the foundation, crossing strips and matching chart.
Previews show up to the first two pages. Download the PDF for every page listed in its contents.
Preview of the actual PDF. Open the PDF
MAKE IT WORK FOR YOU
Free · 52 KB · No account needed
Print at actual size and measure the 50 mm reference line before using physical measurements.
Enter these page numbers in your PDF viewer’s print range. Keep any instructions, matching answers and required project pieces.
Studio opens its own editable layout. Check its preview before downloading.
Balanced twill paper weave - 2 over, 2 under / LETTER
This is a paper craft and pattern sample. No durability, heat resistance or physical assembly result is claimed.
A correct repeat beginning in the wrong position can lose the intended structure. Follow the chart from the first cell of each row, and compare the visible crossings before fixing the strip ends.
A 140 × 140 mm foundation, twelve 140 × 9 mm crossing strips, and a 4-row weave sequence.
Make one trial on ordinary paper before using special stock or preparing a batch. No physical test result is claimed.
KEEP THE IDEA GOING
Paper crafts
Try a plain paper weave with alternating crossings and a matched chart. This is a useful starting sequence before comparing diagonal or balanced-twill variants.
Paper crafts
Make a diagonal paper weave using a two-over, one-under sequence with changing row starts. Use the supplied chart to establish the diagonal instead of repeating the same start on every row.
Paper crafts
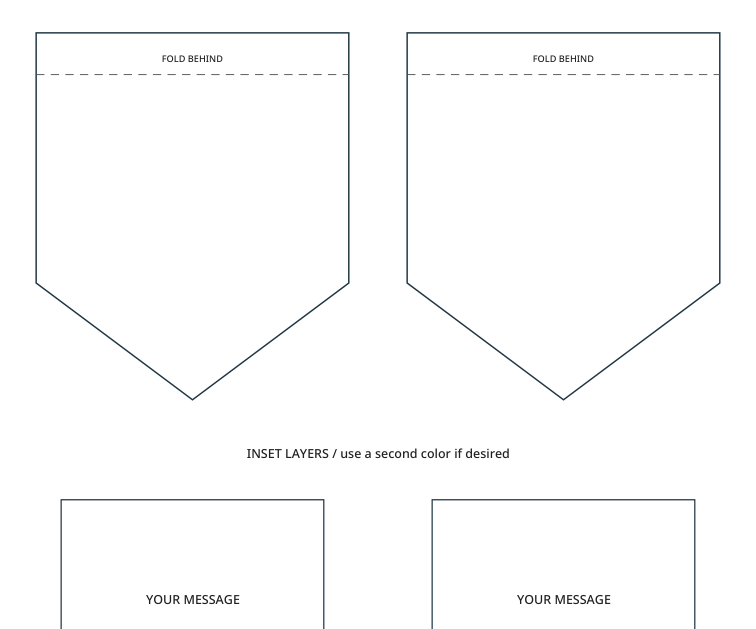
Build layered bunting with separate outer pennants and inset pieces. The hanging flap belongs to the outer piece; the inset is positioned below it.